
Leaks – the word every tradesperson dreads after they’ve installed a flat roof. It’s what we all want to avoid, so when you’re installing a flat roof for your customer, it’s really important that you deliver a job that will not only keep leaks at bay, but will do so for many years to come. Durability is key, but with so many options available, where do you turn?
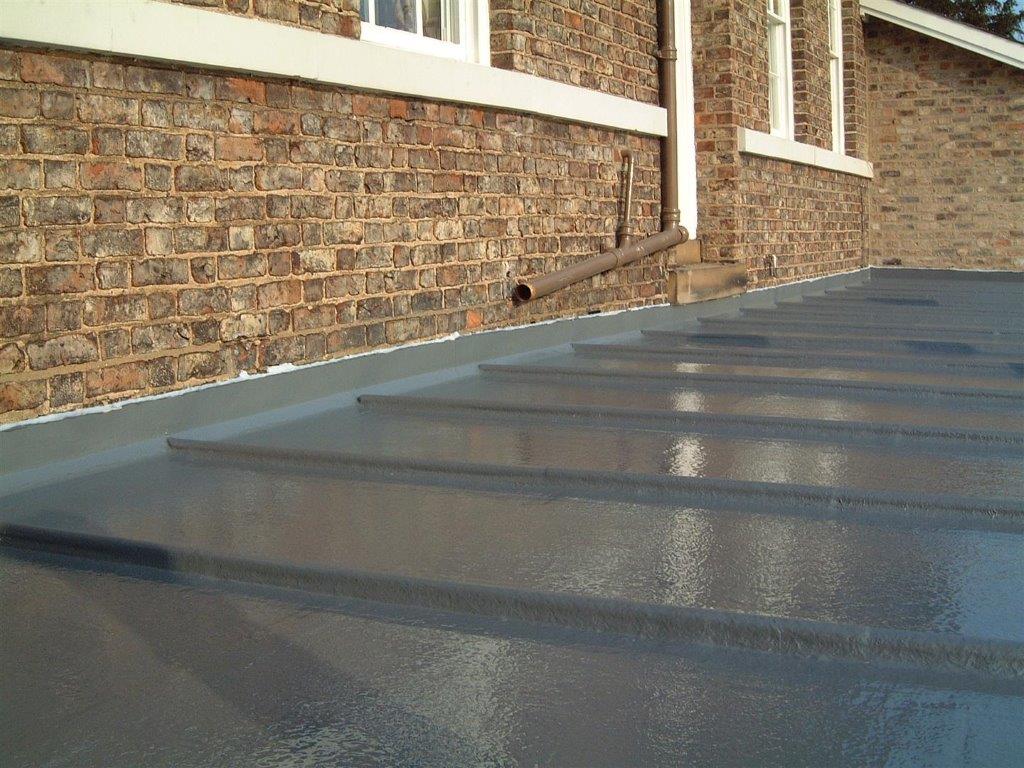
One solution is Glass Reinforced Polyester (GRP) flat roofing systems. They have a very particular makeup and thorough installation process to ensure they provide watertight protection. We chatted to TuffStuff®, one of the UK’s leading manufacturers of GRP waterproof flat roofing systems, to understand the benefits of these products and take you through the installation process step by step.
What are the benefits of flat roofing?
Flat roofing may not be the obvious choice for your client, but they certainly come with a load of benefits. They’re quicker and safer to install than more traditional methods, meaning you can turn around the job in a jiffy. It’s also beneficial for your clients as they’re easy to maintain and surprisingly cost effective.
What jobs are GRP flat roofing systems suitable for?
In addition to your standard flat roof, TuffStuff® products can be used on sloping roofs, green roofs, balconies and even pools, ponds and water tanks. TuffStuff® GRP can mainly be applied by brush or roller, so no complicated equipment is needed. To find out what additional materials you’ll need, use the handy TuffStuff® material calculator.

What’s included in a GRP system?
On to the technical stuff. When it comes to GRP roofing, TuffStuff® has over 30 years’ experience. They currently have two flat roofing systems; their original heavy-duty glass reinforced plastic system: TuffStuff® GRP, and the new polyurethane-based system: TuffTech Pro®.
TuffStuff® GRP roofing is a wet laid, single ply GRP laminate made up of two layers of base coat resin, sandwiching a layer of glass fibre reinforcing mat. You apply it to good quality plywood decking and finish off with a range of edge trims suitable for all applications along with a coat of coloured top resin.
To make your life that bit easier, all the components have been engineered to be used together, come with a 25-year guarantee, are fire retardant to BS47603 and comply with Building Regulations. The system also comes in a range of finishes, including heavy duty or slip–proof options, to make sure you have the right solution for any job.
What preparation do I need to do?
Waterproofing systems need dry conditions to work, as any rain or damp will result in delamination. So before you jump head first into the job, it’s worth checking the weather forecast for rain to make sure you have as clear a run as possible so work isn’t held up. You then need to prepare the existing substrate for the decking boards. If the surface is already suitable, you can remove this to expose the joists – just make sure you check for rot and replace any damaged timber. However, if you’re also going to be updating the insulation, then you’ll need to remove all previous decking and waterproofing.
You’ll also need to consider the fall of the roof to allow for adequate drainage. Building Regulations call for a minimum fall of 1:60 – remember, the better the fall, the less chance of ponding.
How to install?
Here’s a basic step–by–step guide to installing a TuffStuff® flat roofing system. For more details, download their handy installation guide:
- Strip the roof down until the roof joists are exposed and check the joists for rot
- If a cold roof insulation is needed (insulation between joists), lay the fibre quilt over the joints, leaving a 50mm gap between the insulation and the underside of the decking to avoid condensation
- Lay your decking boards, starting at the furthest edge from the drainage edge. It’s recommended you use OSB3 as your decking board and specifically 2440 x 590 x 18mm, T & G Boards
- If a warm roof insulation is needed (insulation above joists), you’ll need to create a sub-deck for it at this stage to incorporate the insulation boards*
- Affix your chosen TuffStuff® edge trims around the roof perimeter and any necessary flashing, parapet walls, expansion joints and gutter systems
- Apply the base coat
- Clean the roof surface to remove any debris
- Begin laminating by rolling out the reinforcing mat and prepare bandage to seal all trims, applying extra base coat as needed
- When laminated and cured, sand down in preparation for the top coat. Note: Some heat can be used to speed up curing, but no naked flames should be used
- Apply the top coat. If you’re opting for a non-slip finish, sprinkle by hand whilst the top coat is being applied
For more information on flat roofing systems or for further training, get in touch with your local branch or visit TuffStuff®’s website.
*Flat roof insulation is covered under of the Green Homes Grant Scheme, meaning your customers can cash in on vouchers for up to £5,000. Just make sure you use an insulation approach that’s covered by the grant. For more information email [email protected] or visit www.jewson.co.uk.