
Whether it’s for an extra bedroom, bathroom, office space or that all-important ‘man cave’. Loft conversions are a great way to add space to your customer’s home, especially if there isn’t room to build an extension.
They’re an option for most properties which have a sloped roof and won’t often need planning permission either! This means the job can usually be done with minimal delays and hold-ups. However, there’s still a lot of work that needs to go into these types of projects, so let’s look at some of the basics you should consider.
The legal stuff
There are a few key things you’ll need know when it comes to permissions. Although loft conversions won’t often need planning permission, there are some cases when they will – like if the space is more than 50m2, or if the dormer is higher than the tallest point of the roof or within 20cm of the eaves. To be extra sure, you should check with the homeowner about whether they have talked to their local planning department before getting you to work on the job.
As the project will convert an inhabitable space into a habitable one, it will also still need to be approved by Building Control. This process involves an examination of the general structure of the proposed build, the fire escapes, and the electrics. In this video, Anna from LABC talks about what this means.
Once the space has been assessed and deemed fit to be converted, it’s time to get cracking!
Working from the ground up
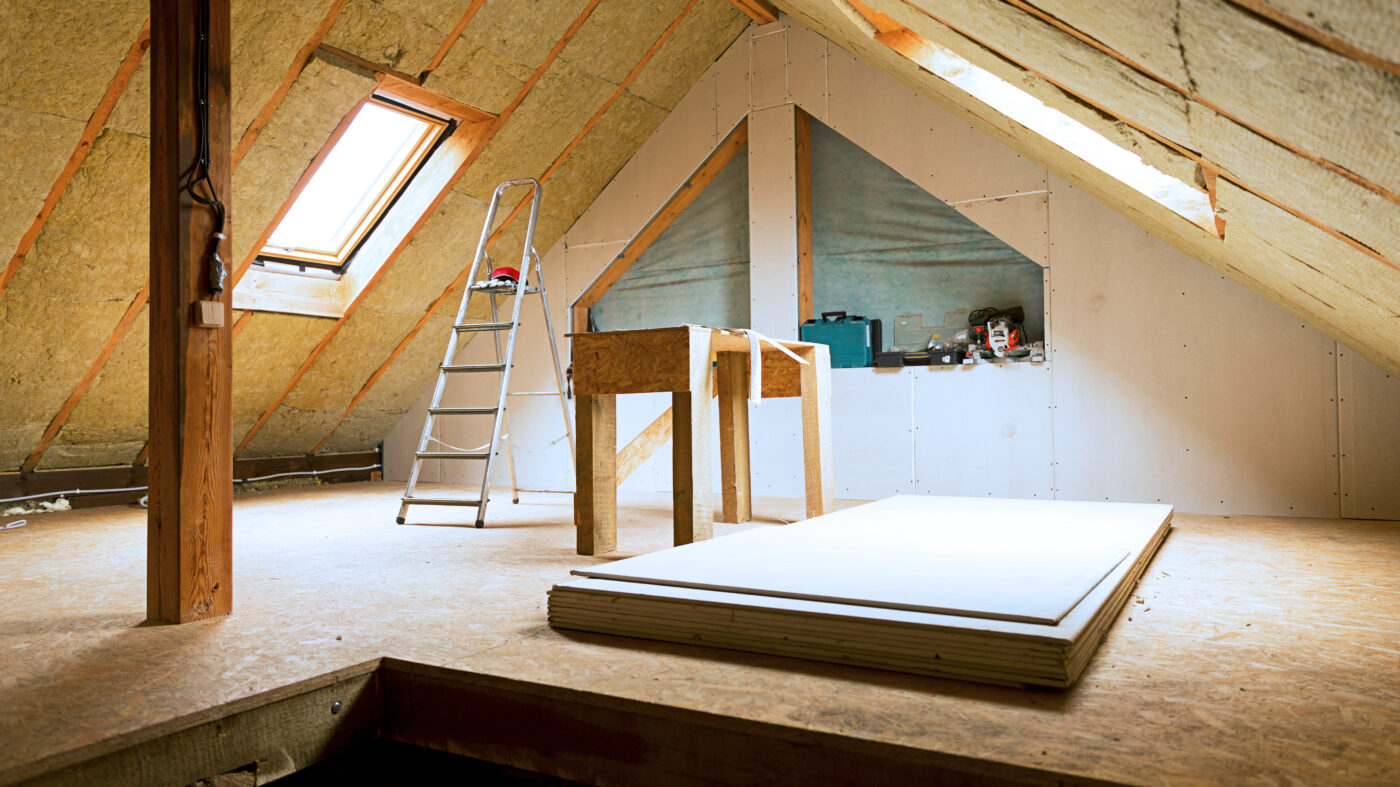
We think it’s easier to start at the bottom of a conversion and work your way up, beginning with the floor joists. Of course, the size of timber and spacing depends on the span and load bearing, but the most common joists are the 47mm x 225mm timbers, placed with a spacing of 400mm. Once laid, you can move on to install any new pipework or wiring.
After the new joists are laid, insulation needs to be added. This should be installed to a depth of 100mm, a process which is then inspected by Building Control. If you want to use a highly reliable insulation product, we’d suggest going for Isover’s insulation – made by Saint-Gobain, which is both durable and recyclable! When the insulation passes inspection, you can go on to lay the floorboards. We’d recommend tongue-and-grove chipboards, preferably water-resistant ones if you’re installing a bathroom up there.
Moving on up
To further open up the space, the purlins, struts and collars will all need to be removed, which means that the rafters will have to be reinforced to make sure the conversion is safe and in-line with structural regulations.
Similar to the flooring, roof insulation needs to be installed in the spacing between the rafters. It’s also important to think about ventilation at this stage. Due to the way heat moves, loft conversions commonly get very hot in summer and very cold in winter, so it’s a good idea to add in systems that can control and moderate the temperature. UnoHab, a single room heat recovery unit by Airflow, is a great solution that helps distribute heat evenly around a space.
Depending on the design of the job, you may need to add in a partition wall; for an en-suite bathroom for example. These are typically made up of 50mm x 75mm CLS timber studs with 400mm centres. For any new openings you will also have to fit door linings, casings and architraves.
Note: regulations may require a new door to be Fire Check rated and the lining and casing to have an intumescent strip fitted.
The home stretch
With the joists, insulation, rafters and partition walls all taken care of, you can now add any new electrics and access panels, and install the plasterboard. If the new space will include a bathroom, this will also need to be cladded with a cement-based aquaboard, and you’ll need to install an extractor fan.
Although not essential, dormers and skylights are a great way of letting in extra light, and can also help to make the space feel bigger and more comfortable. As you’ll be creating an opening, it’s best to wait for a clear and bright day. These will then need to be tiled and cladded to make sure they’re weatherproof.
Of course, every loft conversion will look different depending on what the customer’s looking for, but this should give you a rough overview of where to begin. For more information or guidance, visit the Jewson website, or get in touch with your local branch.